

How to Remove a Wifi Network on Mac
Having your Mac remember your go-to networks is helpful, but sometimes your preferences can get lost in the mix. Here's how to add, remove, and prioritize Wi-Fi on your Mac.
Image: Apple
Modern work has many employees always on the move, shifting around the office, working from home, and sometimes logging in from around the world. For many people, all you need is a solid laptop and a wireless internet connection, and you are good to go.
However, for Mac users, that means that your computer could be remembering a bunch of different networks that you'll never use again, or could be prioritizing the wrong network. This isn't the end of the world, though, as it is fairly easy to manage your wireless networks on your Mac.
SEE: How to clear your cache and cookies in every major web browser
To help you get more work done on your Mac, this article will explain how to add a wireless network, how to remove a wireless network, and how to prioritize the existing networks your computer has remembered.
Note: For this article, I am using a 2016 MacBook Pro with Touch Bar, running macOS Sierra, but these steps should work for a few prior operating systems as well.
To begin, go to your Dock and click on "System Preferences," the silver app icon that looks like a set of gears. From there, click on the "Network" option toward the middle of the screen. Make sure you have "Wi-Fi" selected on the left-hand side, and that the status bar says "Connected."
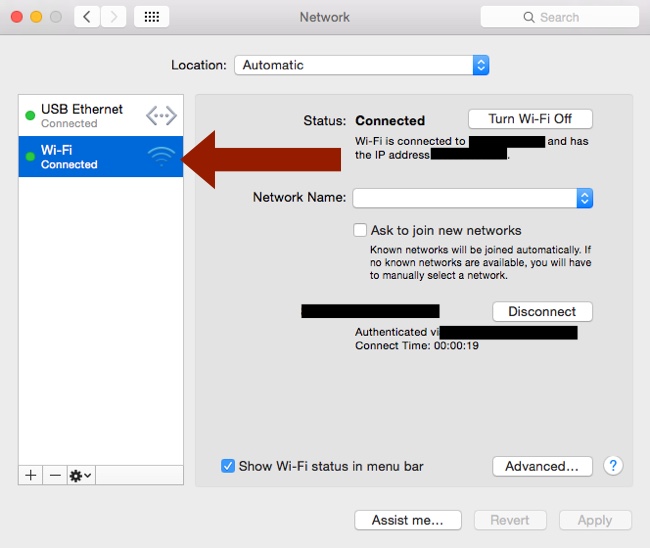
Once these steps have been completed, click on the "Advanced..." button on the bottom right of the window. This is the window through which you'll be able to add or remove a network, or reorder your network preferences.
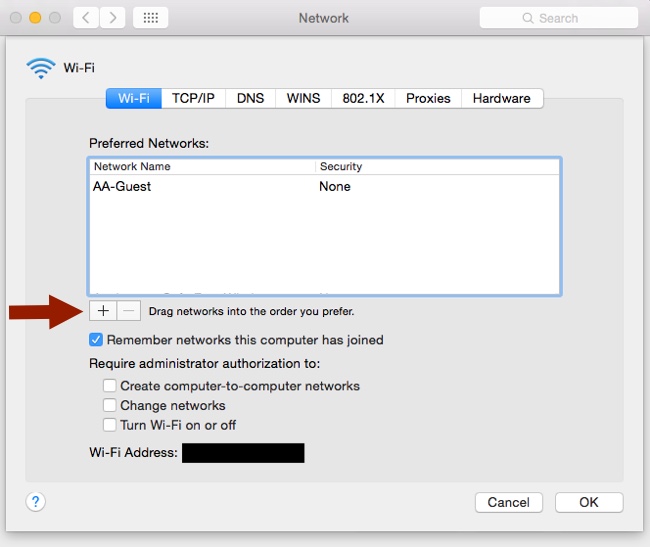
To add a network, click the plus symbol (+) under the list of preferred networks. A window will then pop up prompting you to enter the name of the network manually, and to select its security type from a drop-down menu option. Once you have completed these tasks, you can click "OK." However, if you think the network may be listed, you can also try to click "Show Networks" and select it from a window that will appear. If you follow this path, enter your credentials and click "Join," and the network will be added to your profile.
If your Mac constantly tries to join a network for which your credentials have expired, or a network that has a weaker signal than the others around it, you may want to remove it from your profile. To do this, go back to the window you got to by clicking "Network" and then "Advanced..." Under the list of your "Preferred Networks," you should see many networks that you regularly access.
To remove any one of these, subsequently keeping your Mac from automatically connecting to it, click on the name of the network to highlight it, and then click the minus symbol (-) to remove it. You may receive a warning message that lets you know your Mac and other devices using iCloud Keychain will no longer join this network. If that doesn't pose a problem, then click "Remove." Older OS versions may simply remove the network name from the "Preferred Networks" list. When you are finished, make sure you click "OK."
If you don't want to remove any network, but simply want to reorder them by preference, you can do so by clicking the name of the network in the "Preferred Networks" list and dragging it up or down. Once you have them in the order you prefer, click "OK." The networks at the top of the list will be prioritized when your computer is trying to connect to the internet.
If you don't want to deal with managing a ton of networks in the future, you may consider unchecking the box next to "Remember networks this computer has joined." Additionally, from this page you can find your computer's Wi-Fi address at the bottom of the window.
When you close out the window, you will be asked "Would you like to apply your changes before closing the Network preferences pane?" Click "Apply" to make sure all of you changes are saved.

Apple Weekly Newsletter
Whether you want iPhone and Mac tips or the latest enterprise-specific Apple news, we've got you covered. Delivered Tuesdays
Sign up todayAlso see
- Apple sues Qualcomm for $1B over held money, extortion (TechRepublic)
- Here's why Apple is looking to break free from Intel (ZDNet)
- How to migrate settings, printers, and networks between Macs (TechRepublic)
- Indian minister says Apple will start making iPhones in Bangalore (ZDNet)
- How to migrate applications between Macs (TechRepublic)
How to Remove a Wifi Network on Mac
Source: https://www.techrepublic.com/article/how-to-add-or-remove-a-wireless-network-on-your-mac/
0 Response to "How to Remove a Wifi Network on Mac"
Post a Comment